
Android Wireless Debugging Using Plugin or ADB
Connect wirelessly to run and debug your applications
As Android developers, we daily code and run our applications to check the output. I think the most fascinating aspect of Android development is that we see the results instantly on our mobile. But sometimes we feel disgusted about USB disconnections while debugging or running our apps.
The reasons may be many, like broken or non-functional cables or someone unexpectedly pulls the cable. The most preferred solution to this problem is wireless debugging.
In this article, let’s discuss two ways of connecting a device wirelessly to debug applications. The first way is the Android WIFI ADB plugin approach, and the other approach is to connect the device by its IP address.
Plugin Approach
Plugins are nothing but plug-and-play components. Android WIFI ADB is a plugin available in Android Studio that helps you to connect your system to devices over a Wi-Fi network. It allows you to quickly connect your Android device over Wi-Fi by pressing one button, to install, run, and debug your applications without a USB connection. (If you don’t know how plugins work, check out my previous article on Android Studio Plugin.)
Once the device is connected, you no longer need the USB cable to debug.
Let’s check the steps to follow on how to connect a device.
Step 1. Install the Android WIFI ADB plugin
To find the plugins section, go to preferences and select the plugins on the right side in Android Studio. Then, you’ll find the following screen:

You can use the search bar to search for a plugin you’re interested in, or you can scroll down to the end to check out the different plugins available. When you click on any plugin on the righthand side, you can check out the info related to the plugin. And after, if you’re interested, just click on the Install button. Then click on Apply. After that, restart the studio so the changes get reflected, and you can use the plugin.
In our case, let’s search for Android WIFI ADB on the plugins search bar. Then we can find a list of different plugins available from different publishers. Let’s choose the plugin from the publisher Pedro Vicente Gomez Sanchez because I used it, and it felt convenient.
File → Settings → Plugins → Browse Repositories → Search “Android WiFi ADB”
After installing, restart your studio. Once the studio is re-opened, you can find the tab on the right side or on the top bar, as shown below:
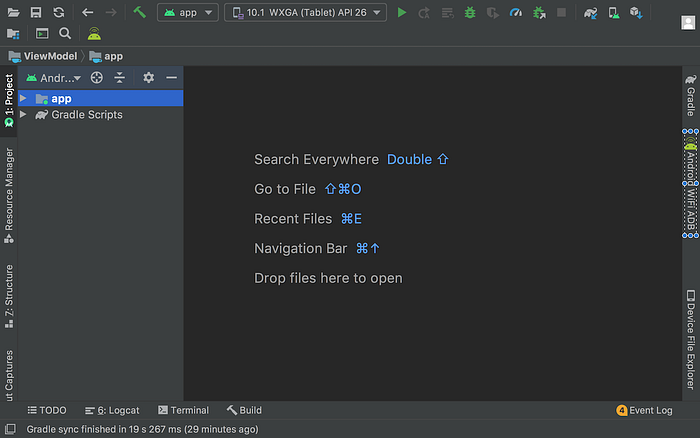
Step 2. Click on the Android WIFI ADB tab on the right panel
When you click on that, it opens a window with the list of connected devices, if any. If no device is connected, it shows the “zero case” message. Also, remember that both the system and mobile should be connected over the same Wi-Fi network to get the devices connected.
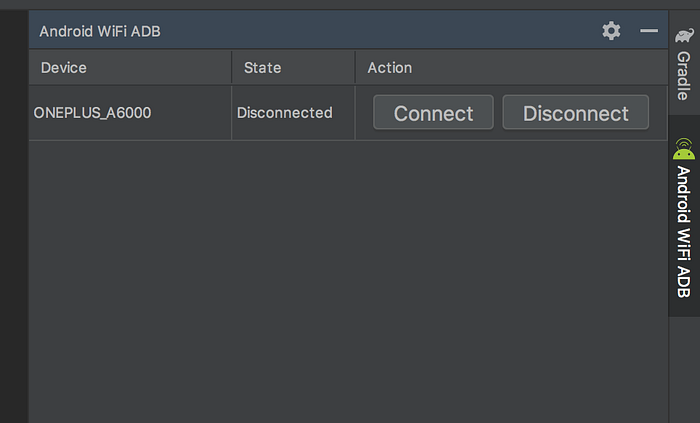
Step 3. Establish the connection
Initially, as we haven’t connected any device, it shows the state as “Disconnected.” Click on the Connect button to connect to your device. Once it shows the state “Connected,” you can remove your USB to run and debug your applications.
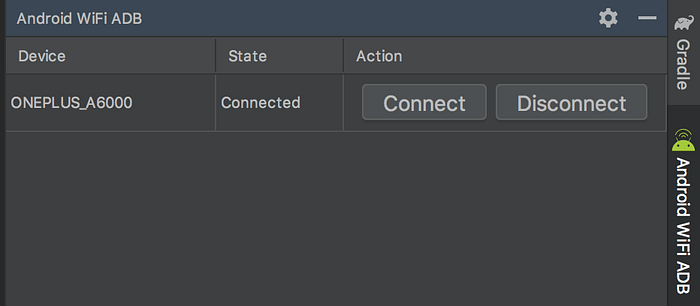
While connecting, you can see an image as follows, demonstrating that it was connecting through an IP address over the Wi-Fi network.

IP Address Approach
In this approach, we will use the ADB (Android Debug Bridge)tool available in Platform-Tools inside the Android SDK.
Let’s check how to work with the ADB tool. If you are on a Mac, go to terminal, tap the command adb, and hit Enter. Then it will display a sequence of options available if the PATH variable is set in .bash_profile. If not, you need to configure the PATH variable in the bash_profile file. For that, open terminal and type:
$ open -t .bash_profile
This opens the bash_profile file in text format so that you can set your PATH variable there.
export PATH = $PATH:/Users/satyapavankumarkantamani/Library/Android/sdk/platform-tools/
Check whether the Platform-Tools path is set. If not, copy the Platform-Tools path from your SDK location and replace it in the line above. That way, you can execute the adb command from a terminal, rather than always changing your directory to the Platform-Tools path.
If you’re working on Windows, check that the environment variables path is set to the Platform-Tools. As you’ve configured the paths, just execute your commands type adb in the terminal or at the command prompt, which gives you the list of options.
Remember, for both the approaches we need to be connected over the same Wi-Fi network in the system and mobile. Let’s get started.
Step 1. Connect the device to the system via USB for initial setup
To check whether it’s properly connected, open the built-in terminal and run the command adb devices. This gives you the list of devices currently connected.

Step 2. Set the target device to listen for a TCP/IP connection on port 5555
adb tcpip 5555

Step 3. Find the IP address of the Android device
For example, on a Nexus device, you can find the IP address at Settings > About the tablet (or About phone) > Status > IP address.
On a Wear OS device, you can find the IP address at Settings > Wi-Fi Settings > Advanced > IP address.
On my devices, it’s in the path Settings > Wi-Fi Settings > Wi-fi preferences> IP address(Scroll to the bottom).
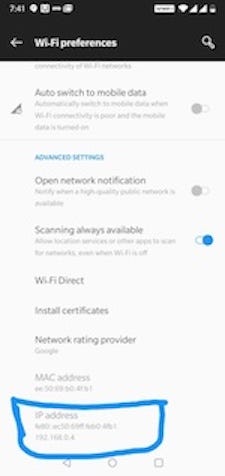
Step 4. Connect to the device by its IP address
adb connect IP_Address

Step 5. Remove the USB cable and test your connection by typing the initial command
adb devices

That’s it, we’re done. We can run and debug wirelessly now.
If the adb connection is ever lost:
- Make sure that your host is still connected to the same Wi-Fi network your Android device is.
- Reconnect by executing the
adb connectstep again. - If that doesn’t work, reset your
adbhost:
adb kill-server
Then start over from the beginning.
Note
Both approaches work if connected over the same Wi-Fi network. Installing the APK over Wi-Fi may take a little bit more time, which is negligible when compared with the benefits.
References
That’s all for now, and I hope you enjoyed reading this article. Please let me know your suggestions and comments.
Fonte: https://betterprogramming.pub/android-wireless-debugging-using-plugin-or-adb-f2234db6b8f9