
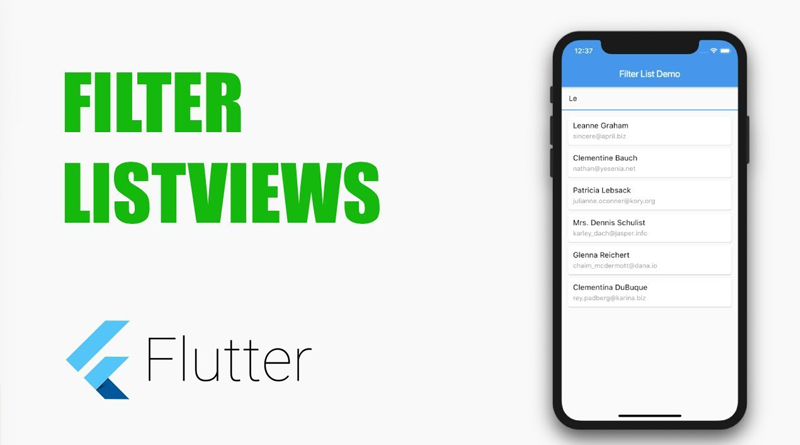
Flutter Apply Filter On JSON ListView Using PHP MySQL Show Selected Item
Filter functionality is used in nearly every mobile applications which has dynamic content. There are many types of filter functionality available in mobile apps. Today we are going to Flutter Apply Filter On JSON ListView Using PHP MySQL Show Selected Item on next activity screen. We are filtering all the record based on Record ID. So let’s get started .
What we are doing in this project (Must Read):-
We are creating MySQL database on our online hosting server and then we would create a Table in MySQL database. Now we would enter some records in our MySQL table. We are using PHP scripting language to make server API which converts all the database data into JSON format which we would parse into our flutter ListView. We would Add Item click onPress event on ListView and on onPress event get the selected item ID and send the ID to next activity. In next activity we would again hit a web API created on our server and pass the ID along with it using post method. Now on the server API it will filter the record from MySQL table based on ID and returns us the Complete student record which we would parse into our flutter activity and show inside ListView.
Contents in this project Flutter Apply Filter On JSON ListView Using PHP MySQL Show Selected Item on Next Activity Screen in Android iOS Example Tutorial:
1. Creating MySQL Database with Table:
1. I am using my own sub-domain name flutter-examples.000webhostapp.com connected with web hosting. I am using MySQL database in current tutorial. So open your PhpMyAdmin control panel in your hosting panel because the MySQL database is hosted in PhpMyAdmin. Now create a new database or you can use your own already existed database like i did in below screenshot.

2. After done creating or selecting database you have to make a Table in it. So enter the table name as Student_Data with 4 Columns and press the Go button to create Table in selected database.

3. There are 4 column present in our Table. id, student_name, student_phone_number and student_class. The id datatype should be set as integer and all the other three columns type is Varchar. We are using Varchar datatype for other columns because it can store both integer and string characters. The length should be 255 and id should be set as Primary Key with Auto Increment. Hit the Save button.

4. After we save the Table. The table structure should look like below screenshot.

5. Our table is yet empty so we have to insert some records manually in our table. Click on the Insert button.

6. After we insert few records our table structure should look like below screenshot.

Here you go guys. Now our database part is done.
2. Creating Web API Using PHP Scripting Language:
1. We are using PHP to create Web API in our tutorial. We will create 3 .php extension files.
2. Creating a PHP file named as DatabaseConfig.php . This file will contain all the major database connection configration. You have to change all the details present in this file as per your Database configuration. After done making changes we have to upload this file into our hosting server.
| 123456789101112131415 | <?php //Define your host here. $HostName = “localhost”; //Define your MySQL Database Name here. $DatabaseName = “id11189654_flutter_db”; //Define your Database UserName here. $HostUser = “id11189654_root”; //Define your Database Password here. $HostPass = “1234567890”; ?> |
3. Create a PHP file named as Students_List.php . Using this file we will convert all the MySQL database details into JSON Format. We would upload this file on hosting server using file manager. After done uploading the file the complete API URL will be flutter-examples.000webhostapp.com/getStudentInfo.php . We would use this URL in our flutter project.
Complete Source code for Students_List.php file:
| 123456789101112131415161718192021222324252627282930313233 | <?phpinclude ‘DatabaseConfig.php’; // Creating connection $conn = new mysqli($HostName, $HostUser, $HostPass, $DatabaseName); if ($conn->connect_error) { die(“Connection failed: ” . $conn->connect_error);} // Creating SQL command to fetch all records from Student_Data Table. $sql = “SELECT * FROM Student_Data”; $result = $conn->query($sql); if ($result->num_rows >0) { while($row[] = $result->fetch_assoc()) { $item = $row; $json = json_encode($item, JSON_NUMERIC_CHECK); } } else { echo “No Data Found.”;}echo $json;$conn->close(); ?> |
Screenshot of JSON:

4. Create another PHP file named as GetStudent.php . We would also upload this file on our hosting server. In this file we would first receive the ID sent by flutter application and return only the selected record based on ID filter. After done uploading the file API URL will be flutter-examples.000webhostapp.com/filter/GetStudent.php .
Complete Source Code for GetStudent.php file:
| 123456789101112131415161718192021222324252627282930313233343536373839404142 | <?php // Importing DatabaseConfig.php file.include ‘DatabaseConfig.php’; // Creating MySQL Connection. $con = mysqli_connect($HostName, $HostUser, $HostPass, $DatabaseName); // Getting the received ID in JSON Format into $json variable. $json = file_get_contents(‘php://input’); // Decoding the received JSON. $obj = json_decode($json,true); // Populate ID from JSON $obj array and store into $ID variable. $ID = $obj[‘id’]; //Fetching the selected record as per ID. $CheckSQL = “SELECT * FROM Student_Data WHERE id=’$ID'”; $result = $con->query($CheckSQL); if ($result->num_rows >0) { while($row[] = $result->fetch_assoc()) { $Item = $row; $json = json_encode($Item, JSON_NUMERIC_CHECK); } }else { echo “No Results Found.”; } echo $json; $con->close();?> |
Now the API creating part is finished.
3. Installing the http.dart package in our Flutter Project:
1. We are using the http.dart package in our flutter project to sent and receive data from server using Get and Post methods. So open your Flutter Project root folder and open pubspec.yaml file in code editor.

2. Open pubspec.yaml file in code editor and find dependencies and Put http: ^0.12.0 in next line like i did in below code.
| 1234 | dependencies: http: ^0.12.0 flutter: sdk: flutter |
Complete Source code for my pubspec.yaml file:
| 12345678910111213141516171819202122 | name: myprojectdescription: A new Flutter project. version: 1.0.0+1 environment: sdk: “>=2.1.0 <3.0.0” dependencies: http: ^0.12.0 flutter: sdk: flutter cupertino_icons: ^0.1.2 dev_dependencies: flutter_test: sdk: flutter flutter: uses-material-design: true |
3. After done saving the file we have to open the flutter project root folder in Command Prompt or Terminal and execute flutter pub get command. This command will refresh the complete project and download the newly added package in current project.

4. Start Coding For Flutter App:
1. Import material.dart, dart:convert and http.dart package in your flutter project’s main.dart file.
| 123 | import ‘package:flutter/material.dart’;import ‘dart:convert’;import ‘package:http/http.dart’ as http; |
2. Create void main runApp() inbuilt function and here we would call our main MyApp class.
| 1 | void main() => runApp(MyApp()); |
3. Creating our main MyApp class extends with State less widget. In this class we would call the MainListView class.
| 12345678910111213 | class MyApp extends StatelessWidget { @override Widget build(BuildContext context) { return MaterialApp( home: Scaffold( appBar: AppBar( title: Text(‘Apply Item Filter on JSON ListView’) ), body: MainListView(), ), ); }} |
4. Create a class named as Studentdata. We would use this class to populate items from JSON coming from server one by one. We would make 4 variable named as studentID, studentName, studentPhoneNumber, studentSubject which would hold and populate items from JSON.
| 1234567891011121314151617181920212223 | class Studentdata { int studentID; String studentName; int studentPhoneNumber; String studentSubject; Studentdata({ this.studentID, this.studentName, this.studentPhoneNumber, this.studentSubject }); factory Studentdata.fromJson(Map<String, dynamic> json) { return Studentdata( studentID: json[‘id’], studentName: json[‘student_name’], studentPhoneNumber: json[‘student_phone_number’], studentSubject: json[‘student_class’] ); }} |
5. Create a class named as MainListView extends StatefulWidget. In this class we would make the createState() method and pass the child MainListViewState class along with it.
| 12345 | class MainListView extends StatefulWidget { MainListViewState createState() => MainListViewState(); } |
6. Create a class named as MainListViewState extends with State. This is our main First Screen for flutter application. In this class we would parse JSON from server using API URL and display the items into ListView.
| 1234 | class MainListViewState extends State { } |
7. Creating a String variable named as apiURL in MainListViewState. In this variable we would pass the web API URL.
| 1 | final String apiURL = ‘https://flutter-examples.000webhostapp.com/getStudentInfo.php’; |
8. Creating a function named as fetchStudents() In MainListViewState class. In this function we would fetch all the records from JSON.
| 123456789101112131415161718 | Future<List<Studentdata>> fetchStudents() async { var response = await http.get(apiURL); if (response.statusCode == 200) { final items = json.decode(response.body).cast<Map<String, dynamic>>(); List<Studentdata> studentList = items.map<Studentdata>((json) { return Studentdata.fromJson(json); }).toList(); return studentList; } else { throw Exception(‘Failed to load data from Server.’); } } |
9. Create a function named as navigateToNextActivity with 2 arguments Context and dataHolder in MainListViewState class. We would call this function on each ListView item click event so when app user clicks on the ListView item it would automatically navigate to next activity and send the Selected Item ID along with it.
| 123456789 | navigateToNextActivity(BuildContext context, int dataHolder) { Navigator.of(context).push( MaterialPageRoute( builder: (context) => SecondScreenState(dataHolder.toString()) ) ); } |
10. Creating Widget Build Area in MainListViewState class. Now we would make the Future Builder widget and returns the ListView widget. We would also display the CircularProgressIndicator() widget while data is loading from server as Loader.
| 123456789101112131415161718192021222324252627282930313233 | Widget build(BuildContext context) { return FutureBuilder<List<Studentdata>>( future: fetchStudents(), builder: (context, snapshot) { if (!snapshot.hasData) return Center( child: CircularProgressIndicator() ); return ListView( children: snapshot.data .map((data) => Column(children: <Widget>[ GestureDetector( onTap: (){navigateToNextActivity(context, data.studentID);}, child: Row( crossAxisAlignment: CrossAxisAlignment.start, children: [ Padding( padding: EdgeInsets.fromLTRB(20, 5, 0, 5), child: Text(data.studentName, style: TextStyle(fontSize: 21), textAlign: TextAlign.left)) ]),), Divider(color: Colors.black), ],)) .toList(), ); }, ); } |
Complete Source code for MainListViewState class:
| 1234567891011121314151617181920212223242526272829303132333435363738394041424344454647484950515253545556575859606162636465666768 | class MainListViewState extends State { final String apiURL = ‘https://flutter-examples.000webhostapp.com/getStudentInfo.php’; Future<List<Studentdata>> fetchStudents() async { var response = await http.get(apiURL); if (response.statusCode == 200) { final items = json.decode(response.body).cast<Map<String, dynamic>>(); List<Studentdata> studentList = items.map<Studentdata>((json) { return Studentdata.fromJson(json); }).toList(); return studentList; } else { throw Exception(‘Failed to load data from Server.’); } } navigateToNextActivity(BuildContext context, int dataHolder) { Navigator.of(context).push( MaterialPageRoute( builder: (context) => SecondScreenState(dataHolder.toString()) ) ); } @override Widget build(BuildContext context) { return FutureBuilder<List<Studentdata>>( future: fetchStudents(), builder: (context, snapshot) { if (!snapshot.hasData) return Center( child: CircularProgressIndicator() ); return ListView( children: snapshot.data .map((data) => Column(children: <Widget>[ GestureDetector( onTap: (){navigateToNextActivity(context, data.studentID);}, child: Row( crossAxisAlignment: CrossAxisAlignment.start, children: [ Padding( padding: EdgeInsets.fromLTRB(20, 5, 0, 5), child: Text(data.studentName, style: TextStyle(fontSize: 21), textAlign: TextAlign.left)) ]),), Divider(color: Colors.black), ],)) .toList(), ); }, ); }} |
11. Create a class named as SecondScreenState extends StatefulWidget. In this class we would first receive the sent ID from previous activity and make the createState() method of State and pass the SecondScreen class name along with it.
| 12345678 | class SecondScreenState extends StatefulWidget { final String idHolder; SecondScreenState(this.idHolder); @override State<StatefulWidget> createState() { return SecondScreen(this.idHolder); }} |
12. Create a Class named as SecondScreen. This is our next screen where the selected ListView item record will displayed.
| 1234 | class SecondScreen extends State<SecondScreenState> { } |
13. Create a String variable named as idHolder in SecondScreen class. Now we would make the Constructor of this class and pass the idHolder variable init. Using this method we can store the selected item ID in idHolder variable.
| 123 | final String idHolder ; SecondScreen(this.idHolder); |
14. Create a String variable named as url in SecondScreen class. Here we would pass our filter record API URL.
| 1 | var url = ‘https://flutter-examples.000webhostapp.com/filter/GetStudent.php’; |
15. Create a function named as fetchStudent() in SecondScreen class. In this function we would First store the ID into data variable with param. Now we would call the API URL and make the POST method and send the ID to server and in return server returns us the complete record based on ID.
| 12345678910111213141516171819202122 | Future<List<Studentdata>> fetchStudent() async { var data = {‘id’: int.parse(idHolder)}; var response = await http.post(url, body: json.encode(data)); if (response.statusCode == 200) { print(response.statusCode); final items = json.decode(response.body).cast<Map<String, dynamic>>(); List<Studentdata> studentList = items.map<Studentdata>((json) { return Studentdata.fromJson(json); }).toList(); return studentList; } else { throw Exception(‘Failed to load data from Server.’); } } |
16. Create Widget Build area in SecondScreen class. Now we would make the FutureBuilder widget with ListView return. We would also display the CircularProgressIndicator() widget on data loading time.
| 12345678910111213141516171819202122232425262728293031323334353637383940414243444546474849505152535455 | Widget build(BuildContext context) { return MaterialApp( home: Scaffold( appBar: AppBar( title: Text(‘Showing Selected Item Details’), automaticallyImplyLeading: true, leading: IconButton(icon:Icon(Icons.arrow_back), onPressed:() => Navigator.pop(context, false), ) ), body: FutureBuilder<List<Studentdata>>( future: fetchStudent(), builder: (context, snapshot) { if (!snapshot.hasData) return Center( child: CircularProgressIndicator() ); return ListView( children: snapshot.data .map((data) => Column(children: <Widget>[ GestureDetector( onTap: (){print(data.studentName);}, child: Column( crossAxisAlignment: CrossAxisAlignment.start, children: [ Padding( padding: EdgeInsets.fromLTRB(0, 20, 0, 10), child: Text(‘ID = ‘ + data.studentID.toString(), style: TextStyle(fontSize: 21))), Padding( padding: EdgeInsets.fromLTRB(0, 0, 0, 10), child: Text(‘Name = ‘ + data.studentName, style: TextStyle(fontSize: 21))), Padding( padding: EdgeInsets.fromLTRB(0, 0, 0, 10), child: Text(‘Phone Number = ‘ + data.studentPhoneNumber.toString(), style: TextStyle(fontSize: 21))), Padding( padding: EdgeInsets.fromLTRB(0, 0, 0, 10), child: Text(‘Class = ‘ + data.studentSubject, style: TextStyle(fontSize: 21))), ]),) ],)) .toList(), ); }, ) )); } |
17. Complete source code for main.dart file:
| 123456789101112131415161718192021222324252627282930313233343536373839404142434445464748495051525354555657585960616263646566676869707172737475767778798081828384858687888990919293949596979899100101102103104105106107108109110111112113114115116117118119120121122123124125126127128129130131132133134135136137138139140141142143144145146147148149150151152153154155156157158159160161162163164165166167168169170171172173174175176177178179180181182183184185186187188189190191192193194195196197198199200201202203204205206207208209210211212213214215216217 | import ‘package:flutter/material.dart’;import ‘dart:convert’;import ‘package:http/http.dart’ as http; void main() => runApp(MyApp()); class MyApp extends StatelessWidget { @override Widget build(BuildContext context) { return MaterialApp( home: Scaffold( appBar: AppBar( title: Text(‘Apply Item Filter on JSON ListView’) ), body: MainListView(), ), ); }} class Studentdata { int studentID; String studentName; int studentPhoneNumber; String studentSubject; Studentdata({ this.studentID, this.studentName, this.studentPhoneNumber, this.studentSubject }); factory Studentdata.fromJson(Map<String, dynamic> json) { return Studentdata( studentID: json[‘id’], studentName: json[‘student_name’], studentPhoneNumber: json[‘student_phone_number’], studentSubject: json[‘student_class’] ); }} class MainListView extends StatefulWidget { MainListViewState createState() => MainListViewState(); } class MainListViewState extends State { final String apiURL = ‘https://flutter-examples.000webhostapp.com/getStudentInfo.php’; Future<List<Studentdata>> fetchStudents() async { var response = await http.get(apiURL); if (response.statusCode == 200) { final items = json.decode(response.body).cast<Map<String, dynamic>>(); List<Studentdata> studentList = items.map<Studentdata>((json) { return Studentdata.fromJson(json); }).toList(); return studentList; } else { throw Exception(‘Failed to load data from Server.’); } } navigateToNextActivity(BuildContext context, int dataHolder) { Navigator.of(context).push( MaterialPageRoute( builder: (context) => SecondScreenState(dataHolder.toString()) ) ); } @override Widget build(BuildContext context) { return FutureBuilder<List<Studentdata>>( future: fetchStudents(), builder: (context, snapshot) { if (!snapshot.hasData) return Center( child: CircularProgressIndicator() ); return ListView( children: snapshot.data .map((data) => Column(children: <Widget>[ GestureDetector( onTap: (){navigateToNextActivity(context, data.studentID);}, child: Row( crossAxisAlignment: CrossAxisAlignment.start, children: [ Padding( padding: EdgeInsets.fromLTRB(20, 5, 0, 5), child: Text(data.studentName, style: TextStyle(fontSize: 21), textAlign: TextAlign.left)) ]),), Divider(color: Colors.black), ],)) .toList(), ); }, ); }} class SecondScreenState extends StatefulWidget { final String idHolder; SecondScreenState(this.idHolder); @override State<StatefulWidget> createState() { return SecondScreen(this.idHolder); }} class SecondScreen extends State<SecondScreenState> { final String idHolder ; SecondScreen(this.idHolder); // API URL var url = ‘https://flutter-examples.000webhostapp.com/filter/GetStudent.php’; Future<List<Studentdata>> fetchStudent() async { var data = {‘id’: int.parse(idHolder)}; var response = await http.post(url, body: json.encode(data)); if (response.statusCode == 200) { print(response.statusCode); final items = json.decode(response.body).cast<Map<String, dynamic>>(); List<Studentdata> studentList = items.map<Studentdata>((json) { return Studentdata.fromJson(json); }).toList(); return studentList; } else { throw Exception(‘Failed to load data from Server.’); } } @overrideWidget build(BuildContext context) { return MaterialApp( home: Scaffold( appBar: AppBar( title: Text(‘Showing Selected Item Details’), automaticallyImplyLeading: true, leading: IconButton(icon:Icon(Icons.arrow_back), onPressed:() => Navigator.pop(context, false), ) ), body: FutureBuilder<List<Studentdata>>( future: fetchStudent(), builder: (context, snapshot) { if (!snapshot.hasData) return Center( child: CircularProgressIndicator() ); return ListView( children: snapshot.data .map((data) => Column(children: <Widget>[ GestureDetector( onTap: (){print(data.studentName);}, child: Column( crossAxisAlignment: CrossAxisAlignment.start, children: [ Padding( padding: EdgeInsets.fromLTRB(0, 20, 0, 10), child: Text(‘ID = ‘ + data.studentID.toString(), style: TextStyle(fontSize: 21))), Padding( padding: EdgeInsets.fromLTRB(0, 0, 0, 10), child: Text(‘Name = ‘ + data.studentName, style: TextStyle(fontSize: 21))), Padding( padding: EdgeInsets.fromLTRB(0, 0, 0, 10), child: Text(‘Phone Number = ‘ + data.studentPhoneNumber.toString(), style: TextStyle(fontSize: 21))), Padding( padding: EdgeInsets.fromLTRB(0, 0, 0, 10), child: Text(‘Class = ‘ + data.studentSubject, style: TextStyle(fontSize: 21))), ]),) ],)) .toList(), ); }, ) )); }} |
Screenshots:


Fonte: https://flutter-examples.com/flutter-apply-filter-on-json-listview/